Applying your stockings by hand:
 |
Before you begin: Remove jewelry and use the fingertips to grasp the stocking. Using Truform Donning Gloves will assist in the application of support stockings. A light dusting of cornstarch (not baby powder) over the foot and ankle will assist in the application if perspiration is present. |
 |
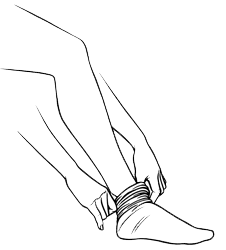
Step 2: Using both hands, place two fingers inside the stocking on each side of the heel, pulling out on each side with equal force. Begin to gently slide the stocking over the toes and foot. |
 |
Step 3: Continue pulling the stocking over your foot until the heel pocket is positioned evenly over the heel. Begin turning the stocking right side out to ensure proper placement on the foot. |
 |
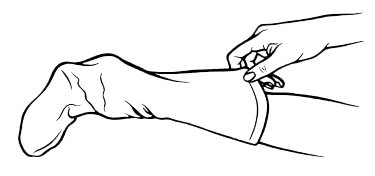
Step 4: After the stocking is turned right side out, use the thumb and forefinger to position the rest of the stocking over your leg, pulling it up in small increments, smoothing it as you go. |
 |
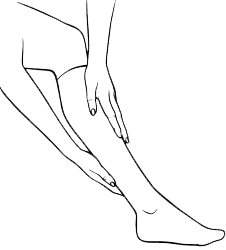
Step 5: Remove any folds by gently pulling upwards. Use both hands to remove any remaining wrinkles. |
 |
Step 6: Your stocking is correctly applied when the heel pocket is centered directly over your heel and the stocking is smooth and uniform in appearance throughout its entire length. Compression stockings may feel different at first: perhaps a snug or tight sensation. This is normal and it shows that they are providing the proper therapeutic support prescribed by your doctor. Your fitter may suggest that you gradually increase your wear time each day until you are comfortable with the fit and feel of your new stockings. If you experienced any discomfort using your garment. Discontinue use immediately and consult your physician. |
Removing your stockings by hand:
 |
Step 1: Grasp the top of the stocking and begin turning it inside out; gently pull down to the ankle. |
 |
Step 2: Insert a finger between the stocking and the leg. Gently pull the stocking over the ankle. |
 |
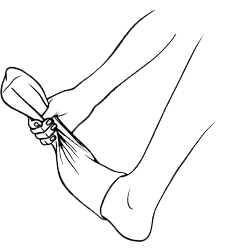
Step 3: Slowly pull the foot of the stocking off the foot. |
Applying your stockings with the Truform Donner:
